Saturday 17 November 2012

Models Own Hi-Definer Ultra-Waterproof Mascara Review!

Hi guys!

This is a post I wrote ages ago and tried to upload ages ago too but couldn't because of the photo memory storage problem, but, better late than never ay?! So, here it is!

Last December I went to the Clothes Show Live, which I absolutely LOVE going to, and one of the goody bag deals that I picked up 
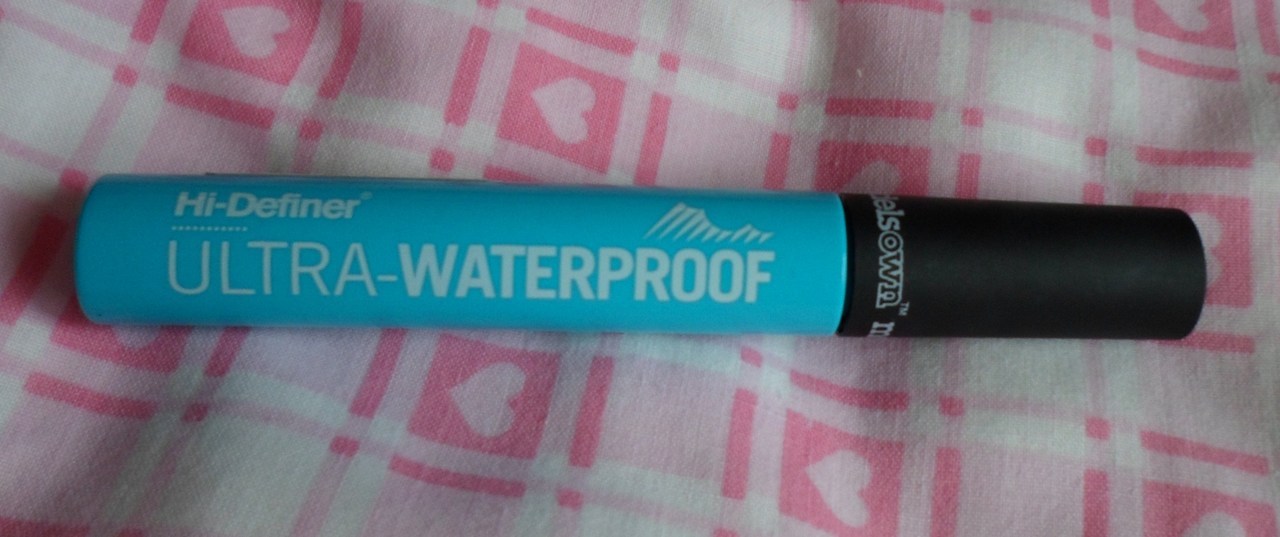
whilst I was there was from Models Own. The goody bag had loads of lovely Models Own goodies in it, one of which was their Hi-Definer Ultra-Waterproof mascara. I actually ended up with loads of mascaras after last Christmas so I’ve only just got round to trying this mascara, and I thought I’d do a quick review of it for you! 

 
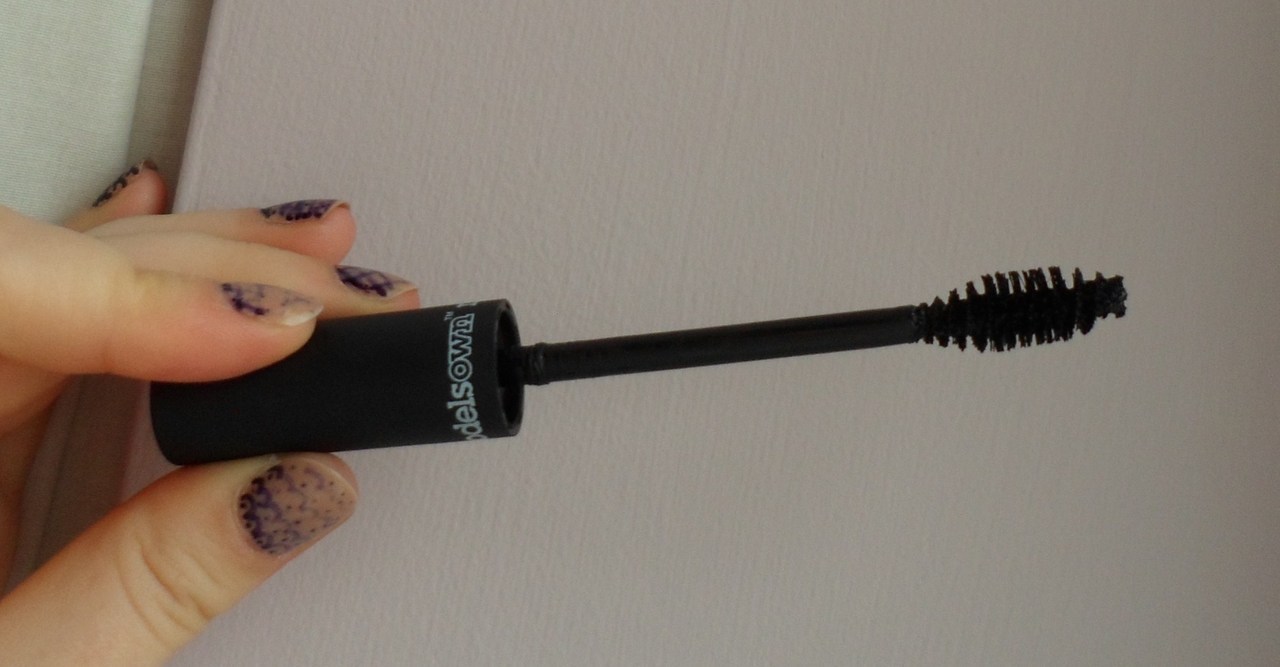
The first thing to take notice of with a mascara is the wand. The shape and density of the wand along with the material it’s made from greatly affects the outcome of how your lashes look as well as how easy it is to apply. For instance if the mascara wand is big, with bristles that are all really close together, it will create a really voluminous look, but will probably be a bit more difficult to apply than a smaller, less dense brush 
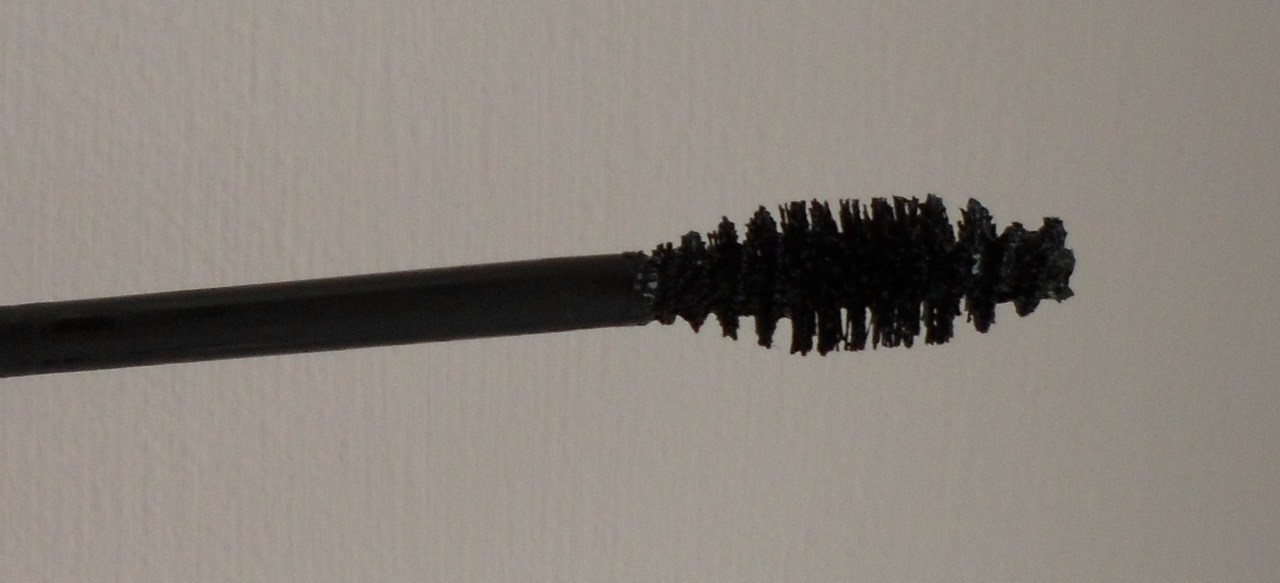
would. The wand on this brush is quite short, with bristles that are very dense in the middle, getting more spaced out at either end. I don’t really think this is the best brush, in fact it’s fairly average. I find it quite difficult to work with, as it’s too short to grab all your lashes at once so you have to work a bit to make sure every lash is covered. I’m also not too fond of the look it gives, as I find it can be a bit spidery at times, however, overall it’s fine, it’s just not fantastic.


Next is the formula. This is basically what the actual mascara liquid is like. For example, some formulas are very dry and flake when you wear them, and others are really liquid and can stick your lashes together or not dry properly on your lashes. The formula of this mascara is on the more liquid side and at first can make your lashes a little sticky. I often find I need to separate my lashes, particularly my outside corner lashes, with a lash comb as they do tend to stick together with this mascara, but again, overall it’s alright.
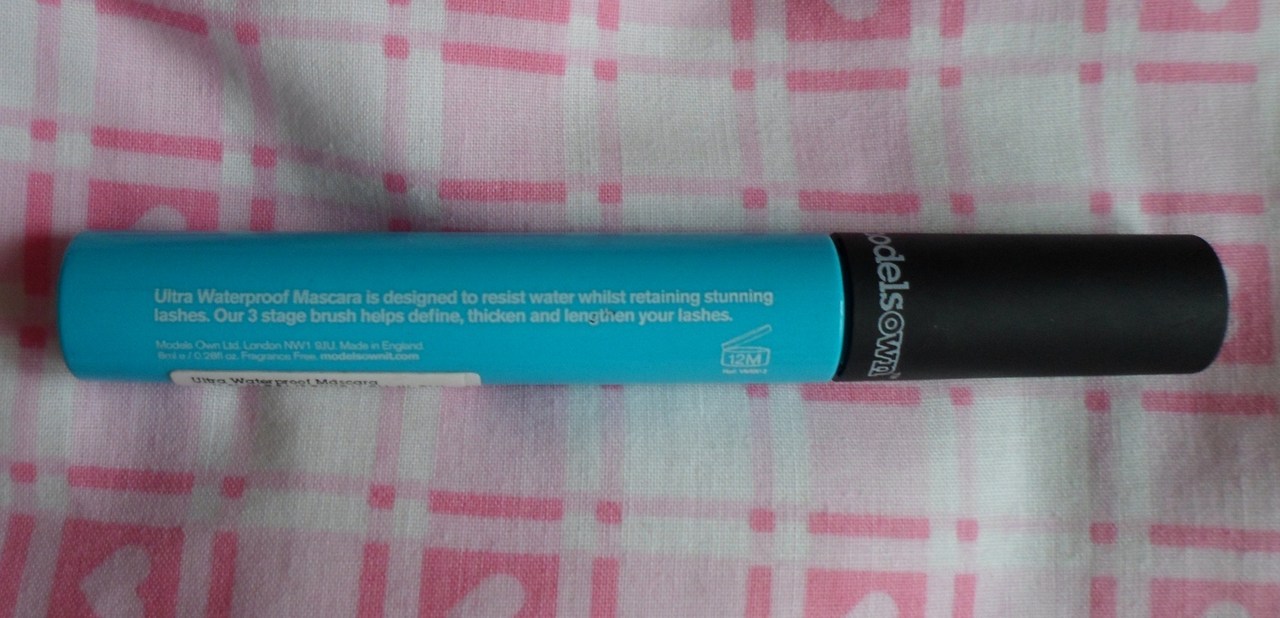
Now, onto the part of this mascara that is the main attraction, its ‘waterproofness’. This mascara really is ultra-waterproof! I went swimming with it on, and it didn’t budge, so then I went again just to make sure it wasn’t a fluke the first time and once again it didn’t budge. Unfortunately I didn’t think to get photos of it on those days so instead I wore it the other day for about 12 hours and took photos before and after so you could see how it lasted. I didn’t go swimming that day however I was doing a fair bit of crying from laughing too much so you can see how well it stayed on. It can sometimes transfer slightly onto your eyelids just after you’ve put it on so you end up with little black marks on your eyelids which is annoying, but, if you put powder on your eyelids then this definitely helps to prevent this. Apart from the little bit of transfer though, this is a really, really good mascara to get you through the day without smudging or running and I would particularly recommend it for any emotional days!

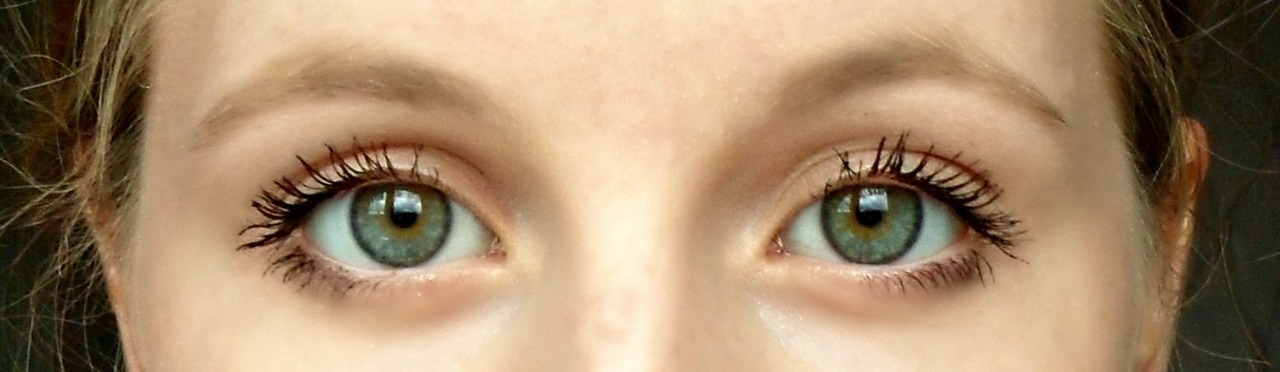
Eyes just after applying Models Own Hi-Definer Ultra-Waterproof Mascara
(sorry for my tired eyes but it was just after waking up!)


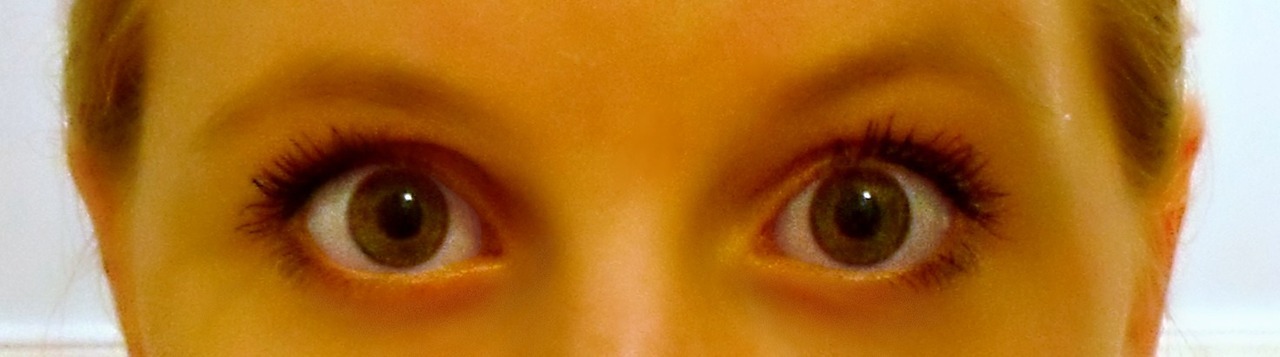
Eyes after 12 hours wear of Models Own Hi-Definer Ultra-Waterproof Mascara
(Sorry for the rubbish photo and really 'yellowy' colour - it's the lightbulb in my bathroom - I've not turned into one of the Simpsons!)
So, overall, this mascara is definitely not the best mascara I’ve ever used, but it’s also not the worst, it’s just fairly average. However, at a price of £6.00 (from Boots), and with the great added bonus of being waterproof I would definitely recommend it for those of you on a hunt for a mascara that will last throughout the day, no matter how emotional it is!

Hope you like this review and find it helpful! I will be back soon with another review, but until then, as always, thank you for reading, feel free to subscribe if you like my blog, or you can follow my twitter @megankathleenm where I will always tweet when I have a new post!
xxx

Saturday 3 November 2012

Free Nails Inc Polish with December 2012 Glamour Magazine!

Hi guys!

So this is just a quick post to let you know about an amazing deal which I thought many of you might be interested in.

Just like last year, Glamour are giving away a Nails Inc Nail Varnish when you buy their December edition of the magazine (with Cheryl Cole on the front cover), and, just like last year, I've already been out and bought some!

There are four colours to choose from, a dark blue-black (Motcomb Street), a light pink (Elizabeth Street), a gold glitter (Glamour Glitter) and a red (I don't know the name of this as I haven't got it... yet!). I went out to Boots and purchased the blue, pink and gold glitter yesterday, costing me £6 for £33 worth of Nail Varnish!


Available Colours

I really do think this is an unbelievably good deal and no matter how hard I try, I can't resist such a bargain! I would never buy a Nails Inc polish at the full price of £11, even though they are extremely good quality, because I just think that to pay over £10 for a nail polish is too excessive. However, ask me to pay £2 for it and I am there! Nails Inc is a notoriously good brand and their nail polishes are very high quality with great lasting power. I'm trying to resist going out and buying the red too, but I don't think I'll be able to hold out that long before giving in.

Here are some pictures of the polishes I got:

Nails Inc Elizabeth Street Polish
Nails Inc Glamour Glitter Polish
Nails Inc Motcomb Street Polish

Nails Inc Motcomb Street with Nails Inc Glamour Glitter as Top Coat.
Also in the magazine are free samples of Max Factor Face Finity All Day Flawless Foundation, Nivea Express Hydration Primer, Rimmel BB Cream, Elie Saab Le Parfum perfume and Thierry Mugler Angel perfume.

Hope you enjoy your Nails Inc Polish/Polishes if you get them!
Please subscribe if you like my blog and I shall be back soon with another post for you!
Thanks for reading,
xxx

Tuesday 30 October 2012

Halloween Trick or Treat nails!

Hey guys!

I'm back as promised! Unfortunately I didn't really have much time to do some really creative halloween nails this year, so I kept it simple, but hopefully you'll still enjoy them!

So, here they are:


Hope you like them! Sorry the pictures aren't too great quality!
  
If you want to check out my Halloween Nails from last year then just click here!
 
Hope you all have a very spooky and fun  Halloween! Enjoy, and hopefully I'll be back soon with another post!
 
As always, thank you for reading, subscribe if you like my blog, and I shall be back soon!
 
xxx 

Monday 29 October 2012

Problem Solved?!

Hello again...

So I've finally found a solution (I think?!) to my picture problem - I've now got a Tumblr account! So as a tester I'm trying to repost my Halloween pictures from last year from my new Tumblr page.

Here goes... fingers crossed this works!


Yayyy - It's worked!!! Ahh I am back guys! I'm doing new Halloween nails tonight so will hopefully get those posted for you tomorrow!

Bye for now, and I will be back very, very soon!
xxx

Sunday 2 September 2012

Technology is confusing!

Hi guys!

So some of you may be confused by the title of this blog post seeing as it is definitely not related to cosmetics, which is after all what this blog is normally all about! But, I am currently struggling with Google Blogger because it's not letting me upload any more photos and I don't know why! This means that I haven't been able to post a blog for a little while and won't be able to until I can sort it out, which is why I thought I'd do this little post just to let you know what's going on, so that you know I haven't just disappeared off the face of the Earth! I have actually written quite a few blog posts recently and they are on my laptop waiting for when I can upload them, which hopefully means that although I'm off to Sixth Form soon, I should still be able to post blogs fairly regularly.

So hopefully I'll be back soon, but unfortunately it won't be until I can figure out a way to sort this 'technical issue' out, or until google decides to help me! Hopefully that will be soon, but in the meantime, if any of you have any ideas why blogger's not letting me upload any more photos and how to fix it then feel free to leave a comment and help me out!

Bye for now!
xxx

Saturday 11 August 2012

Olympic Team GB Nails!

Hi guys!
So I know I've been doing a lot of blog posts on nails recently, but I will be doing some posts on different things soon. I've been trying out a couple of different products so I'll get doing a couple of reviews on them, and hopefully get them up on here soon. However, for now, this is another nail tutorial.

I know I did Union Jack nails only a little while ago for the Queen's Jubilee, but it's currently the Olympics, so I thought I'd get my GB nails out in support! The Olympics are being held in London this year, and I've really, really enjoyed watching them so far. I know there's only a couple of days left, but that's still enough time to show your final support for Team GB!

Here's a step by step guide to your Team GB nails:

1. Paint your nails blue. I chose Rimmel I <3 Lasting Finish in 198 Azure, as it's a good colour and a good quality nail polish, but any blue in your collection will do.


2. Take a thin nail brush, (I took a brush from an old nail varnish, cleaned it, then cut it down), or alternatively you could use a paintbrush, and dip it into some white nail varnish. I chose to use NYC Long Wearing Nail Enamel in 134 French White Tip. Then paint a cross onto your nails.


3. Next you need to take your brush and white nail paint again and add a diagonal cross to the cross you've already made.


4. Then, you will need to clean your brush, or take another one, and dip it into some red nail paint and paint a thinner cross on top of the first white cross. I chose to use Revlon Colorstay Longwear Nail Enamel in 120 Red Carpet but any red would do.


5. Now, to finish it off, you need to take your thin brush and red nail paint again, and add in diagonal lines onto the white. In the actual Union Jack flag the red diagonals are not joined to the red cross in the centre, so if you can keep them separate then that would be the ideal, however it doesn't really matter too much if they do join.


And there you have it - Union Jack nails, all ready to show your support for Team GB!

I hope you've enjoyed this small nail design and tutorial, and get cracking on your Team GB nails! Enjoy the rest of the Olympics, and let's hope Team GB can finish with a bang!

As always, thank you for reading, please subscribe if you like my blog, and feel free to follow me on twitter if you want, my twitter is @megankathleenm and I'll always post my new blog posts on there.

xxx

Tuesday 31 July 2012

Revlon Colorstay Longwear Nail Enamel Review Part 2!

Hiya!
I know it’s been a long while – I’m sorry! My life has been pretty hectic recently, in a good way though, but it has meant I haven’t really had much time to blog unfortunately.
I have now finished my exams (thank god!), been on holiday (to Sorrento in Italy which was just AMAZING!), and started my summer work experience so I should now hopefully have a bit more time to blog… hopefully!
Anyways, here is the second part of my review of the Revlon Colorstay Longwear Nail Enamel Review, and unfortunately it’s not going to be a positive review!
As I said in part 1 I wasn’t overly impressed with how long it took to apply, especially seeing as I’m not the most patient of people, however I was very impressed with the finish. It gives a really nice clean, shiny finish; however, as I soon found out, this doesn’t last too long.
I wore this nail varnish for just over a week and took pictures every morning to see how it lasted through the duration of the week. Day 1 is just the same as the pictures from the first part because that was obviously the first day of wearing it.

Here are the rest:
Day 2
Day 2
Day 3
Day 3
Day 4
Day 4
Day 5
Day 5
Day 6
Day 6
Day 7
Day 7
Day 8
Day 8

So, as you can hopefully see from those photos, up to day 3 the polish lasted okay with only a couple of very minor chips; although seeing as it was meant to be able to last up to 11 days, chipping on the third day of wear is not good!

Then from day 4 onwards, they were just chipping and flaking everywhere constantly - it was absolutely rubbish! I was really, really disappointed, especially seeing as it meant I had to write a bad review which I really dislike doing, but you guys need to know - do not buy this nail varnish and expect it to last, because it doesn't!
By day 8 it was just chipped so badly that I couldn't stand leaving it on my nails and had to take it off because it looked a mess. Needless to say I didn't use it on my holiday and instead opted to just go with clean nails with a clear top coat (pretty boring but I preferred that to chipped nail polish).
To be honest, I am just extremely disappointed in this nail varnish from Revlon. I have tried it again since we came back, as has my mum and it just hasn't lasted so I know it wasn't just a one time thing. After hearing such good things about Revlon I was expecting a really good quality nail varnish, and although it wasn't majorly expensive, it wasn't exactly a cheap nail polish either at £7.99 for which I could have bought 2-4 other nail polishes from other brands which would probably have lasted 3 to 4 days with minor chips, which is the same as the Revlon managed.
I do love the colour of the polish and it gives the best finish of any nail polishes I have ever used, it's just a shame that it lasts for such a little length of time! Then of course there's the application of it which I just find takes way too long. I'll still probably use it, but for when I go out and so only need it to last for like one day as it is such a pretty colour with such a good finish and now that I've bought it, even though it's not lived up to expectations at all, it would be a shame to waste it.
So, in conclusion, I am not impressed I'm afraid! Love the colour, love the finish, don't like how long it takes to apply and really don't like how much it chips, especially when it's meant to last up to 11 days! Also, not too fond of the price tag, as although it's no major pull on the purse-strings, it's just not worth it.
So, after that rather negative review (sorry!), as always, thank you for reading, please subscribe if you like my blog, and I really do promise to get back on the ball and get some more posts up for you very soon!
xxx

Monday 4 June 2012

Revlon Colorstay Longwear Nail Enamel Review Part 1!

Hi guys!
Look I'm back already! My last post reminded me just how much I love blogging so I'm determined to get a couple more done before I have to get back to exam mode :L
So the other day I was perusing the beauty aisles of Boots (as I like to do every so often to see what’s new) and noticed that Revlon now have a little section dedicated just to Revlon nail varnishes. As a nail varnish lover I naturally went over to take a closer look and as I did a lovely Revlon Lady working on the aisle came up, complemented me on my Union Jack Nails (:D), then proceeded to tell me all about Revlon's new nail varnishes, 'Revlon Colorstay Longwear Nail Enamel'.
Revlon Colorstay Longwear Nail Enamel in Red Carpet
These are a new range of nail varnishes basically designed to be like a DIY version of a Gel manicure. They are meant to "provide high impact color and gel-like shine in fashion forward range of shades and finishes" and to "provide flexible, shatterproof color with excellent color retention and gloss". Basically it's meant to be a really long lasting, good quality nail varnish. The lady in the shop told me that it can last up to 11 days, which is really good seeing as most nail varnishes only last around 3-4 days, and that the reason for this is that the formula bends with your nail unlike normal nail varnish.

Now I don't know about all that technical kind of stuff, but I'm going on holiday to Italy (which I am extremely excited about! :D) for one week in about four weeks time, and so my mum, sister and I were all planning on getting Shellac manicures before we went so that we didn't have to take nail varnish and nail varnish remover with us etc. However, for all of us to have them done would be quite expensive so I thought why not try this nail varnish out instead?
So, we picked a nice bright colour called 'Red Carpet' which actually looked more coral in the shop, but on is definitely a very vibrant red, and decided that we would try this instead seeing as it was only £7.99 which is a fraction of the cost of what 3 Shellac manicures would have cost us, and which we will get more use out of because we can use it again and again.
Obviously, we didn't want to go on holiday and find that it doesn't work, so this week I am road testing it! I applied it this morning, and so every day, I am going to take a picture of it, then after the eleven days is up, or however long it lasts for if it doesn't manage the eleven days, I will do a post with the results and all the pictures so you can see the state of it through the duration of wear.
I have to say, I wasn’t overly impressed with the application of this nail varnish. It's very thick and like most longwearing nail varnishes, takes forever and a day to dry so if you have no patience, or have a tight schedule then it's just a bit frustrating! Eventually what I ended up doing was painting the base coat (I used the Sally Hansen Base coat that I always use) and first coat last night, then finished it off with the second coat and top coat (I used Natural Collection Clear Top Coat) this morning. That made sure that it had all dried thoroughly and stopped me from getting really bored whilst I waited for it to dry!

Anyways, I'll be back with the pictures from each day and a review of its durability in approximately 11 days! I'll try and do another post between times though, I'm not sure what on yet but I'm sure I'll find something!
As always thank you so much for reading!
xxx

Friday 1 June 2012

Right Royal Nails: Union Jack Nail Design!

Hi guys! 
 It's been a long time since I last posted - I'm sorry! But unfortunately I'm right in the middle of my GCSE exams at the moment so I've been very busy studying for those. But fortunately I now have a week off from exams so I thought I'd get cracking on a nail design for you all!
 For those of you who have miraculously missed out on the thousands of adverts for the Jubilee weekend, or for those who live in other countries and so are unaware, this weekend is the weekend of the Queen's Diamond Jubilee celebrating 60 years on the throne. Now I have to admit, I’m not really into royalty much but this seemed like a good opportunity for a nail design so I thought why not?!
 I did think of crowns or English roses for the design but then I decided it just doesn't get much more British than the Union Jack so that's what I went for! It's a really simple, easy design to create as long as you have a steady hand (or a friend who does!), however it is far easier if you have a thin nail brush as this creates a smooth straight line far more easily.
 For the design you will need a blue nail paint (preferably a royal blue but it doesn't really matter), a white, and a red nail paint. I actually didn't have a royal blue in my vast collection so I used Collection 2000 Hot Looks in BMX Bandit instead which is a slightly paler blue, but I still think this looks just as good. I used N.Y.C Long Wearing Nail Enamel in 134 French White Tip for the white and Rimmel London 60 Seconds in 430 Coralicious (which is technically pink not red but I don't actually own a true red as I have yet to find one) with BarryM Nail Paint in 150 Red Glitter over the top to make it a bit more red and also to add a bit of sparkle, it is the diamond jubilee after all!


 Then the design is easy: First paint a coat of the blue over your entire nail and leave to dry. Then take your thin brush or cocktail stick, whatever you may be using, dip it into your white, and paint a cross on your nails then add the diagonal cross so that you end up with like a star on your nail. Remember to make these lines slightly thicker as your red has to run down the middle of it and make sure to take this right to the edges but don't worry about being too neat, sometimes a bit of scruffiness adds to the look! Leave this to dry. Next, dip your brush into your red and paint a thin line down the middle of the white lines. Leave to dry, add a top coat if necessary or a bit of sparkle if you feel like it and et voile - you have patriotic Union Jack nails!


 Of course you can put your own twist on this design, perhaps using other colours, maybe go for neons, brights or metallics. Or maybe just swap one colour, such as using silver instead of white. Maybe you could just do French tips instead of the whole nail! Whatever you choose to do, have fun with it!

 All that’s left is for me to wish you a happy Jubilee weekend - hopefully I'll be back relatively soon with another post but I'm not going to be able to promise anything unfortunately!

 Oh and as always, thank you so much for reading.

 xxx

Sunday 8 April 2012

Easter Chick Nail Tutorial!

Hi guys! Happy Easter Sunday!

First off, I am so sorry for having been gone so long! It’s been ages! However, I am back now and I have an Easter nail art to make up for it which I hope you’ll all enjoy!
So I was sat up last night at like midnight or something and felt like doing my nails, and came up with this Easter Chick design. It’s really, really simple to do so perfect if you have a spare 20 minutes and fancy taking a break from eating Easter Eggs!
To create these little Easter chicks is ridiculously simple so here are the quick steps:
1.       Paint your nails yellow. Yes, I know, yellow is not a colour you generally reach for to paint your nails but in this case, it’s the perfect colour. However, if you don’t have a yellow, you could go for a cream, a neutral or a pale pastel colour- experiment and see what you think looks good. I used Rimmel London’s I <3 lasting finish in 055 sunshine, which I’ve had for quite a while now so I don’t know if they still do it, but I’m sure there are plenty of other yellows around.
2.       Grab a cocktail stick/toothpick/nail art pen and dip it into some white nail polish. Then use the tip of the cocktail stick, or whatever it is you’ve found to use (hairgrips work quite well actually too) to dot two little white circles next to each other near the top of each nail.
3.       Then, whilst the white is drying, take your cocktail stick and dip it into some orange nail polish. Or, if you don’t have any orange nail polish, because I know it’s not that much of a common colour, you could use a red or pink instead. Then use your cocktail stick to dab a little triangle in the centre underneath the two white circles you have created. The easiest way to make a triangle is to do three dots and just sort of merge them together.
4.       Then, take your cocktail stick and some black nail polish and add little black dots onto each of the white dots, creating little eyes!
5.       Add a quick topcoat of clear nail varnish and you’re all done! Perfect Easter Chick Nails!

Then, if you wanted to get even more creative, you could add legs at the bottom of your nails for the chicks. Or, you could use this to create other animals. For instance, if you change the background colour to grey, change the nose from an orange triangle to a black circle, and add a mouth with some two white rectangles for teeth, you would have an Easter Bunny!

I hope this gives you some inspiration for your own nails - whether you choose to follow my design or get creative with your own design!
I will be back soon, but for now, have an EGGcellent Easter Sunday (I’m sorry- I had to add in an Easter pun somewhere!), make sure to eat your own weight’s worth of Easter chocolate and have fun creating your nail designs!
xxx

Tuesday 20 March 2012

The Body Shop 40% off online discount sale!

Hi guys!
So I'm really, really sorry for the lack of posts recently but unfortunately my GCSE work is getting heavy now and I'm seriously stressing but I will try and get a proper post up soon. Also I think I'm going to try and write a few extra posts over Easter so that I won't totally disappear when it comes to my exams too so hopefully all will go well and I'll be able to manage to keep putting up regular posts... well that's the plan anyways... :L

Anyways, so today, I just wanted to alert you all to the fact that The Body Shop has 40% off all products online including sale products so if you like The Body Shop, or want to try out some new products then now is a good time to stock up!

Also, if you read my review of The Mango Body Butter (linked here) then you might want to try that, so if you do, then you might be pleased to hear that it is now: £7.50 for 300ml and £9.00 for 400ml with the 40% taken off.

If you've read my review then you will know that I definitely reccommend this body butter which is why I thought I would let you all know about the discount offer!

Here is the link to The Body Shop online and the code is EXTRA40.

Enjoy and feel free to comment with any of your Body Shop buys if you want!

I promise to get a review up soon...ish,

Bye for now!

xxx

Wednesday 7 March 2012

The Body Shop: Mango Body Butter Review

Hi guys!
Hope you’re all well and having a good week!
So, in my last post about the Soap and Glory: The Righteous Butter, I mentioned that I had just tried a new body moisturiser that I thought might be even better and that I would do a post on it soon. Well, here is that post, and the body moisturiser is (Drum roll please!): The Body Shop’s Mango Body Butter!
I bought this quite recently from their website when they were on offer and so managed to get this 300ml pot for a bargainous £3! I was only intending on getting a small pot, but at £3, I just couldn’t resist, and I’m glad I didn’t! The full price for a 300ml pot normally is £18.75 which is quite frankly ridiculous but The Body Shop do pretty much consistently run offers and deals so it’s worth keeping an eye out for these so that you can get it for a much better price. You can also buy a 50ml pot for £5, 200ml for £12.50 or 400ml for £25 at standard prices.
The packaging of the body butter isn’t anything special but it is bright, simple and also, practical. I hate impractical packaging such as squirty tubes because you always end up wasting so much product but with a tub you don’t have this problem, and also, once you’ve used up all the product in the tub, you can always use it to store other stuff! So the packaging gets a thumbs up!
The smell of the product I have to say I was doubtful of when I ordered it. In fact,  I probably wouldn’t have chosen this scent if I’d had more choice, but there wasn’t much stock left in my favourite scents from The Body Shop so I just picked mango, despite not having smelt it before. However, I am extremely glad I did as it is a beautiful, light, fresh, summery scent and I just love it! I know it might not be everyone’s cup of tea, and usually I wouldn’t have thought it would be mine, but it really is gorgeous! It will be even more ideal when we eventually get some sunny weather! So I’m definitely glad I took a chance on the mango scent.
Then, the product itself; I’m not entirely sure how to explain just how moisturising this is, it is literally like a drink for your skin, I’m guessing it would be like the equivalent of drinking like a gallon of water! I always put my moisturiser on at night and I will still be able to physically feel the moisture in my skin when I wake up the next morning, and even right through to the evening. It’s just amazing how moisturising it is – I really have never come across anything like it, even Soap and Glory’s The Righteous Butter. Also, because it’s quite a liquid-y formula rather than a really thick one, you don’t really need to use that much product at all, so although a big pot is very expensive, it will last you a long time and if you want to make it last even longer, you don’t really need to use it every day either because it is so moisturising. I would say that you do need to leave your skin for a good while before getting dressed because it does need a while to sink in, but, considering how moisturising it is, I think it can be let off for that!
So, overall, obviously, I am definitely recommending this! However, I wouldn’t advise buying it at full price because that is extremely expensive and if you’re patient a deal will come along sooner or later!
As always, thank you so much for reading and remember to subscribe or follow me on twitter (@megankathleenm) if you want to keep up to date with my posts!
Bye for now!
xxx